|
|


09-02-2006, 11:39 PM
|
|
Hummer Novice
|
|
Join Date: Sep 2006
Location: SE OH
Posts: 12
|
|
 re-attaching cladding
The wheel well/cladding (whatever it might be officially called...) has come unattached.
I've done the normal try to pop it on, get at it from below, etc. It looks like I need to remove the outer beveled part to push this expansion plastic snap back in.
However, its held on with something that is not hex, phillips or flat head. Anyone know what this of attachment screw takes?
Surely this thing isn't a one use and replace item as far as this strange screw hole goes.........
Any recommendations appreciated.
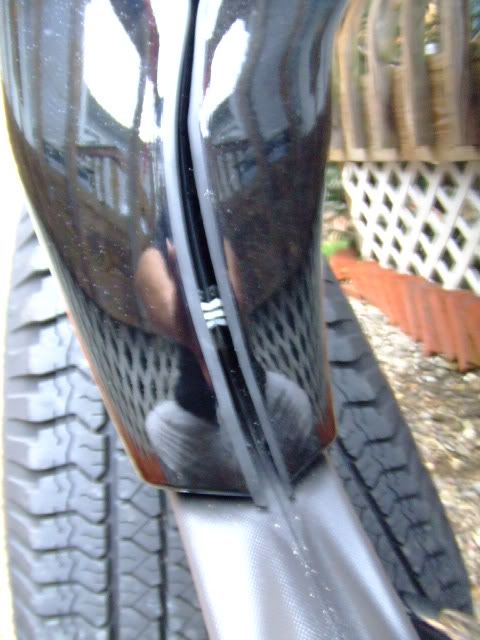
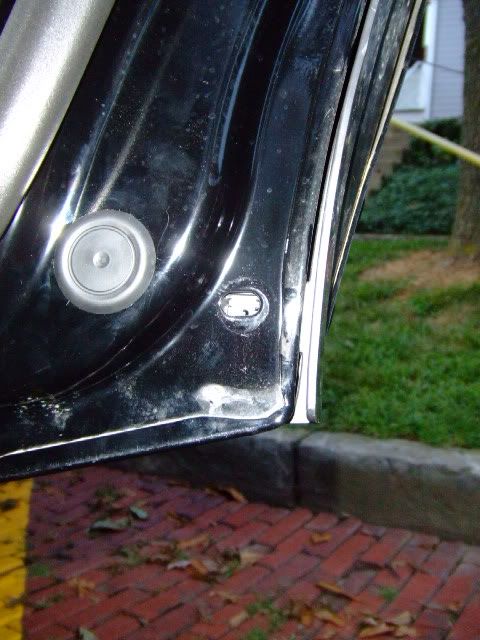
The cladding popping off:
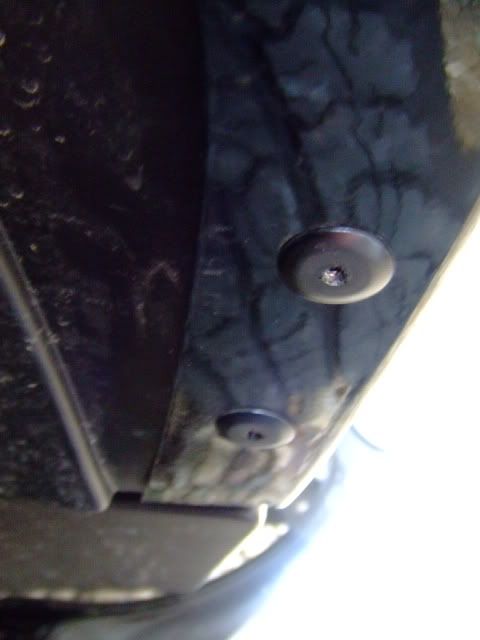
In the right rear wheel well where it appears I could get in there if I knew what to remove these with:
 |
09-03-2006, 12:51 AM
|
|
Hummer Guru
|
|
Join Date: Sep 2005
Posts: 2,980
|
|
Re: re-attaching cladding
Bring it to the dealership and they'll take care of it!
__________________
Black Sheep Hummer Squadron
|
09-03-2006, 02:00 AM
|
|
Hummer Novice
|
|
Join Date: Sep 2006
Location: SE OH
Posts: 12
|
|
Re: re-attaching cladding
Quote:
|
Originally Posted by The Green Lantern
Bring it to the dealership and they'll take care of it!
|
Ya they're 100+ miles away.... I was hoping to fix something simple myself.... hmmm.......... |
09-03-2006, 04:23 AM
|
|
Hummer Veteran
|
|
Join Date: Aug 2006
Location: Santa Fe
Posts: 92
|
|
Re: re-attaching cladding
I believe those are called torx head screws. They look like a star inside right? The drivers come in different sizes, so you may want to get a set of them They usually attach to a 1/4 or 3/8 rachet driver. They use a lot of them in cars/trucks. I had to get a set of like 10 different sizes when I did my stereo in my other car just to get the interior panels off.
__________________
Slate Blue 06 H3 Auto, Lux, Chrome, Navi, Sunroof, Chrome side steps, Home Link, Trailer, & Rig lights
Volant intake, Airaid TB spacer, Custom down pipe, Magnaflow dual Exhaust, NGK iridium plugs, Nitto TG -AT295/75/16, Brush guard, tail light guards, mud guards, Chrome Shorty Antenna & bracket, Chrome lower punch grill & lettering, Chrome side moldings, smoked side marker lenses, 3-D Hummer hitch plug, Body color spare cover, & of course DEBADGED! 
|
09-03-2006, 04:48 AM
|
 |
Hummer Guru
|
|
Join Date: May 2006
Location: florida
Posts: 2,606
|
|
Re: re-attaching cladding
What does it look like on the inside, what does the piece it attaches to look like?
|
09-03-2006, 05:10 AM
|
 |
Hummer Guru
|
|
Join Date: Oct 2005
Location: I CAN BARELY SEE THE ROAD...
Posts: 4,624
|
|
Re: re-attaching cladding
Quote:
|
Originally Posted by The Green Lantern
Bring it to the dealership and they'll take care of it!
|
 thats what the warranty is for, bitch and get a free oil/lube while you are there. |
09-03-2006, 09:08 PM
|
|
Hummer Novice
|
|
Join Date: Sep 2006
Location: SE OH
Posts: 12
|
|
Re: re-attaching cladding

Quote:
|
Originally Posted by dеiтайожни
What does it look like on the inside, what does the piece it attaches to look like?
|
All that is viewable is in the pictures I got above... Someone mentioned a Torx. I think that's it. I have T6, as I used to be into tearing apart cell phones a few years ago... gotta dig that out and see if it fits!
Thanks for the Torx suggestion! |
09-03-2006, 10:26 PM
|
|
Hummer Guru
|
|
Join Date: May 2006
Location: florida
Posts: 2,606
|
|
Re: re-attaching cladding
Doesn't look like torx to me... I only see 3 tiny slots, plus it feels like plastic. So...I think it's a clip or something similar.
|
09-04-2006, 12:56 AM
|
|
Hummer Novice
|
|
Join Date: Sep 2006
Location: SE OH
Posts: 12
|
|
Re: re-attaching cladding
Quote:
|
Originally Posted by dеiтайожни
Doesn't look like torx to me... I only see 3 tiny slots, plus it feels like plastic. So...I think it's a clip or something similar.
|
dеiтайожни you were right. I did find a torx that would spin it, but it would just spin. Later found out they were the self tapping sort of "don't undo" clips. Luckily I didn't destroy them. The metal was the super soft malleable kind that just reshaped every time I put a different tool in it.
Here's the key to getting in there for any of you who have this pop out from a powerful car wash or off roading and brushing a tree branch or something (yes it was that easy)....
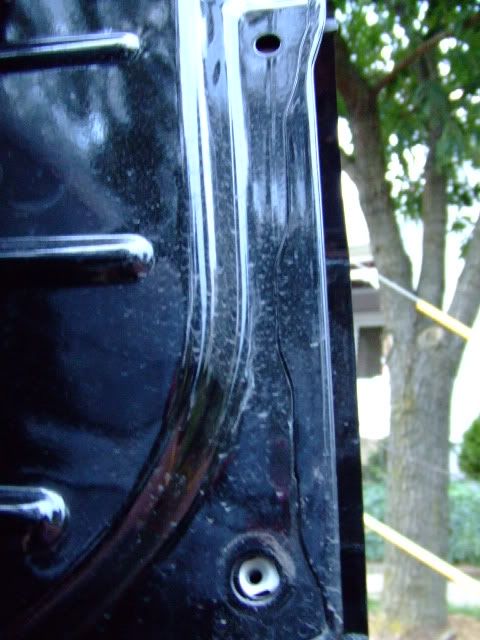
Inside the door there is an outer door seal. That outer door seal is attached to a wheel well shaped piece of plastic. It has two screws in it. Take those out. Above that is a screw into metal but not through this plastic part. Loosen it or take it out.
This allowed me to get enough play in the outer plastic bevel piece to get a screw driver up in there from below to snap it back in.
I snapped it in once and it came back out. Did it again, and so far it stuck. I'm not sure that this is the final fix, but at least I know how now. There may be a little glue or something else involved if I end up doing this again.
No need to touch those ones in the wheel well edge that I pictured earlier.
Here are some pix:
Uppers:
Lower:
Now if someone could get me a photo like this of what the satellite antenna plug looks like, I'd be in business. I didn't have XM in factory, and put sirius in today. Using the included antenna today, ordered the xm to sirius converter, and hope to get that add on off the back of the roof by the door ASAP.
I'd also be happy to get rid of these chromie mirrors and door handles. Oh well. Just more work.
Thanks for the help and suggestions everyone, I got to the solution.
Last edited by thatchman1 : 09-04-2006 at 12:58 AM.
|
| Thread Tools |
Search this Thread |
|
|
|
| Display Modes |
 Linear Mode Linear Mode
|
 Posting Rules
|
You may not post new threads
You may not post replies
You may not post attachments
You may not edit your posts
HTML code is Off
|
|
|
All times are GMT +1. The time now is 06:52 PM.
|